DIY Project: How to make a chalkboard sign
We are having a summer sale at the shop starting this week!
So of course I wanted to have a cute sign for the window. I thought of ordering vinyl, but that can start to get expensive pretty quickly, so I went ahead and made my own sign. You can use these tips for making a wedding sign centerpiece or reception entrance sign, a message board, or even a small hanging sign for the WC that says occupied (if like me your bathroom has no doorlock!). Go nuts, it's easy and fun.
It was pretty easy, here's how I did it.
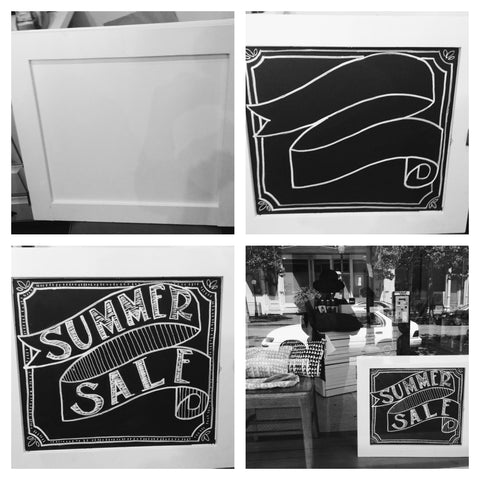
I had an old cabinet door in the shop that I used. I wiped down the door to make a clean painting surface and then taped off the edges of the door to create a clean line for the chalkboard paint. I covered the surface with a 3-4 thin layers of chalkboard paint, waiting in between coats to ensure it was dry. I used a medium size paint brush, but you could easily use a small roller.
I bought a small quart of chalkboard paint months ago and have been using it to make all kinds of signs around the shop, totally worth the investment.

On a piece of paper I sketched out the basic design I wanted and then freehanded it onto the chalk surface with a regular old school piece of chalk. After a few tries I came up with a final design.
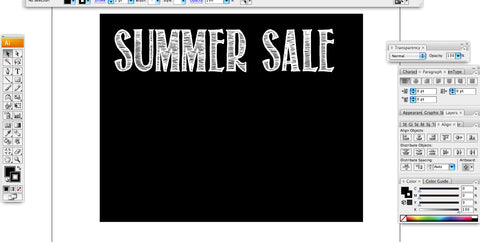
I have a few fonts stored on my computer that make good chalkboard fonts so I created a document with a black background and tested a few options. When I found the font I liked I used it as a guide for drawing the lettering.
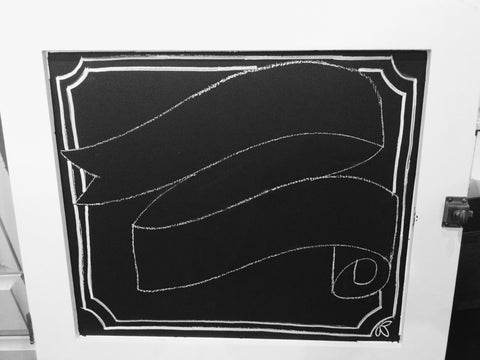
I then went over the chalk lines with a chalk marker to create the clean lines. Once the chalk marker dried I brushed off the original chalk lines, and using a wet rag went back in to clean-up around the marker lines. Some spots needed multiple passes with the marker to make a nice thick line.
TIP: after going over a section, turn the sign 90 degrees and start a new area to ensure you don't mess up the wet lines. make sure an area is completely dry before trying to go over it again with the marker.
UPDATE: I have since gone over the chalk lines with Enamel ONE SHOT sign paint, so that the lines are more permanent and will not smudge when wiped with water. (See our blog DIY PROJECT- HAND PAINTED TABLETOP SIGNAGE for tips on working with enamel paint.

Easy Peasy!

